What you must do BEFORE you begin!
This will cover these points
- Installing Node
- Install a Code Editor (Optional)
- Install The OneBlink CLI Via NodeJS
- Enabling the right permissions on the Console
Install Node
In order to do anything, you’re going to need NodeJS! This will be our entry point in using many different packages and having access to the OneBlink CLI to upload the API you are creating.
You are able to install NodeJS on the Node website featured here.
Install a Code Editor (Optional)
This step is optional, but highly recommended. Unless you want to deal with Notepad or another text editor, it is strongly recommended you install a Code Editor to write all of your code in. Writing your code in a Code Editor will save you a lot of headache and struggles by showing you different errors in your code as well as provide many helpful extensions that can automate and improve your experience.
The Code Editor that is recommended is Visual Studio Code By Microsoft, you can install it from this link here.
Install The OneBlink CLI Via NodeJS
Now, this will be your gateway to getting your API code into your account on the OneBlink Console. Firstly, open up your respective terminal depending on the device you are using.
If you are using Windows: Open up Powershell or CMD.
If you are using Mac: Open up terminal.
Once opened, type in this:
npm install @oneblink/cli -g
This will lead to the OneBlink CLI package being installed on your machine globally.
Now that this is all installed, we have one final step of checking permissions!
Enabling the right permissions on the Console
In order to utilise the CLI to its fullest extent, you will need to ensure that you have the right permissions set in the Console.
You can find the related permissions in roles on the side menu under Administration heading. If you are unable to see this on the side panel, then you do not have access to them. You will need to contact your OneBlink Console Admin and get them to follow these steps.
You can choose to edit an existing role or you can add a new one. After the modal has opened, if you are to scroll down, you can find ‘API Hosting’ under the ‘Advanced’ heading. This is shown below:
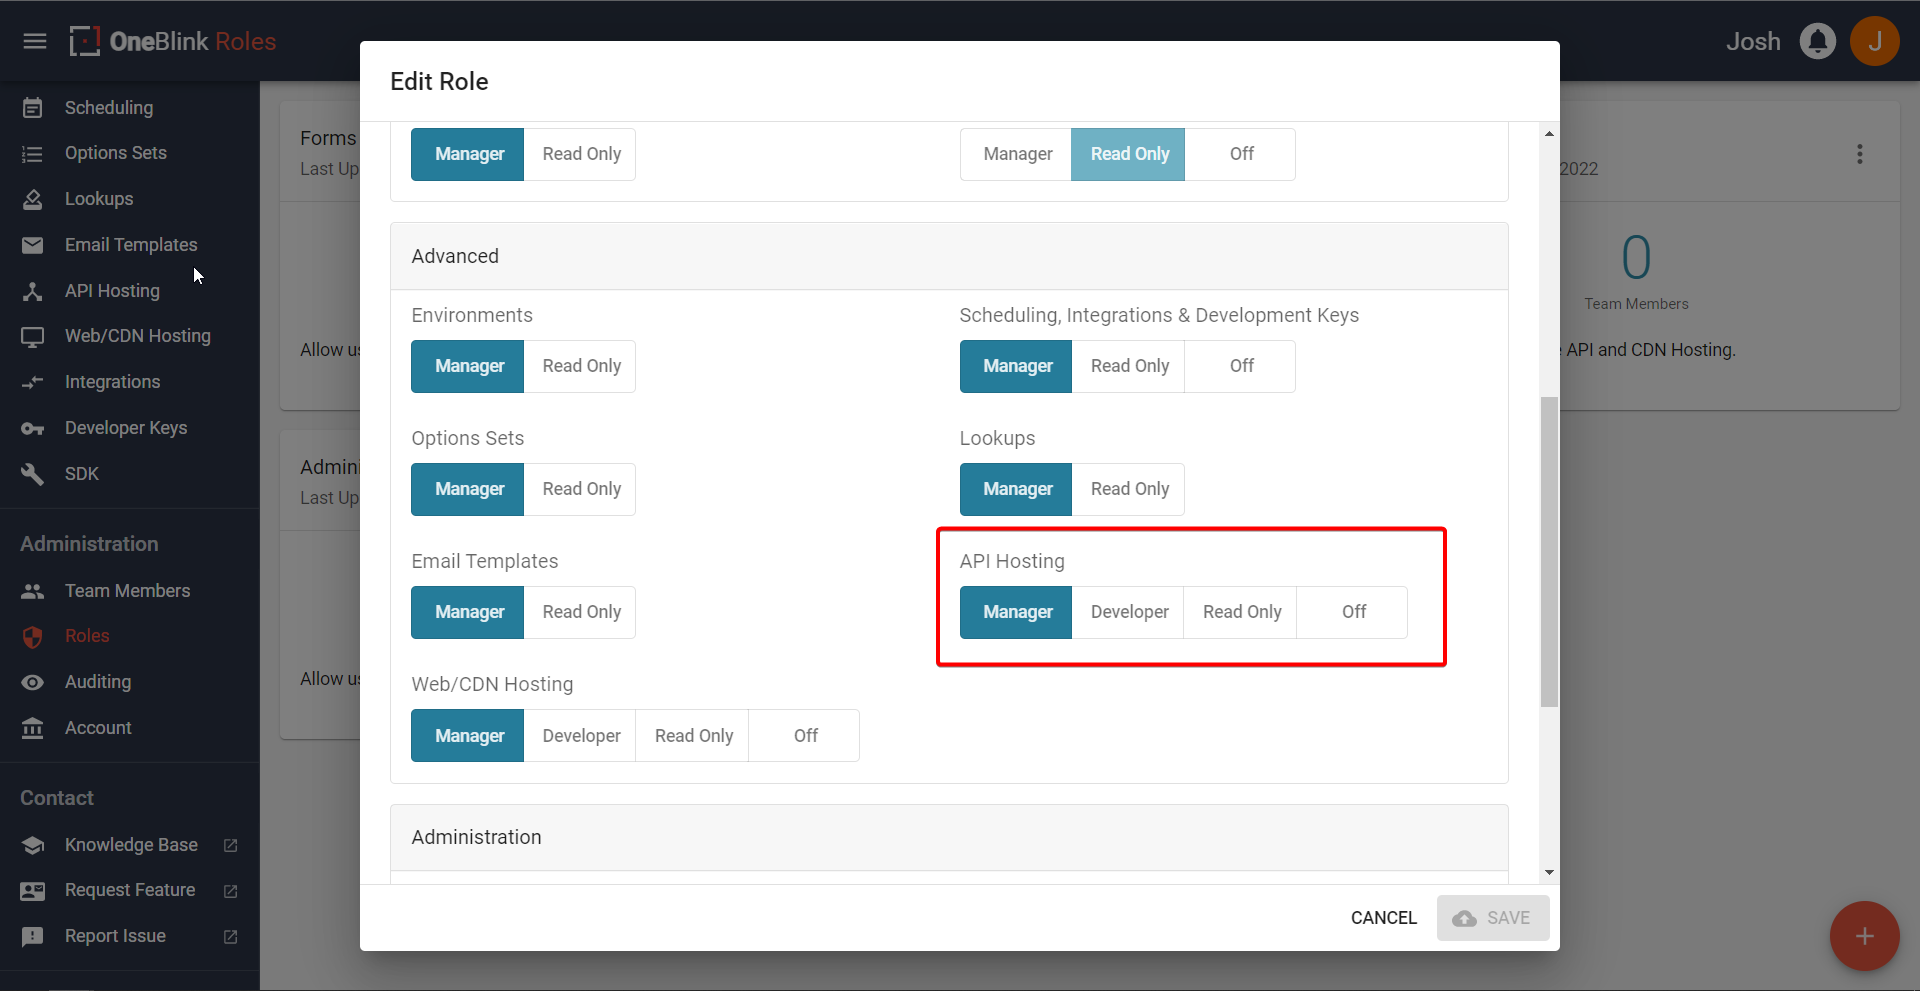
You can see there are 4 options. You can read what each permission will let you do by hovering over it and reading the tooltip, but we can give an extended understanding here. So:
- Manager
- Selecting this option will let you to create and delete hosted APIs on the Console. You will also be able to deploy environments and code changes to the API through the OneBlink CLI.
- Developer
- Selecting this option will let you deploy environments and code changes to the API through the OneBlink CLI. You will be able to view the APIs on the Console.
- Read Only
- The name might give it away but, you are only able to view the APIs on the Console with this permission.
- Off
- Another obvious one but, you have no permissions in regards to API Hosting.
That explains each of the permissions! Make sure you set the right one if you want to deal with deploying API changes!