Hosting your API with OneBlink
Deploying your API
Now we are at the fun stage, deploying our newly created API.
If everything is still setup from the past few steps, then we will be good to go. If not, you will have to ensure that you have logged into the OneBlink CLI and that you are in the right folder in your terminal.
Now we can run the command
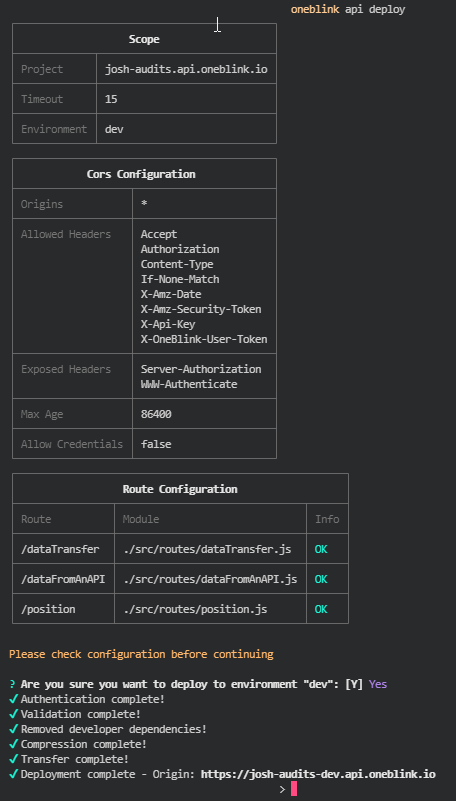
oneblink api deploy
After running this, you will get text in your terminal if it is okay to deploy to that environment, most likely named ‘dev’. If that is fine, you can hit y and enter, then you’re good to go!
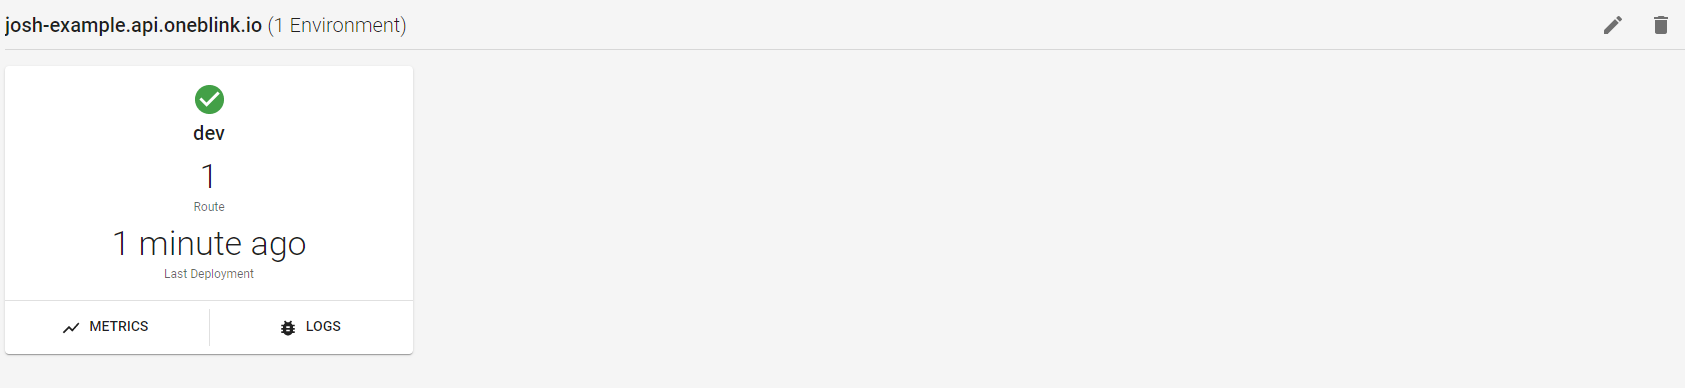
Go check the OneBlink Hosted API page and give it a refresh if required. You should see your brand new shiny API!
Now, you have learnt the steps required to write your own code and host your own API!
Since the API has been hosted, you can go on to explore the other documentation here and learn more regarding OneBlink Hosted APIs!